Contents
- 1 Why Your Bike Chain Keeps Falling Off: What Maybe Causing It and How To Fix It!
- 1.1 Understanding Chain Drops: The Basics
- 1.2 7 Main Causes Why Your Bike Chain Keeps Falling Off
- 1.3 Front Derailleur Problems (Most Common Cause)
- 1.4 Step-by-Step Diagnostic Process
- 1.5 Complete Fix Guide by Problem Type
- 1.6 Prevention Solutions That Actually Work
- 1.7 When Professional Help Makes Sense
- 1.8 Essential Tools and Supplies
- 1.9 Troubleshooting Persistent Issues
- 1.10 Cost Analysis and Long-Term Strategy
- 1.11 Making Chain Drops History
Why Your Bike Chain Keeps Falling Off: What Maybe Causing It and How To Fix It!

Nothing ruins a perfect ride quite like when your bike chain keeps falling off at the worst possible moment. Whether you’re climbing a steep hill, sprinting through an intersection, or descending at high speed, a dropped chain doesn’t just kill your momentum—it can be downright dangerous. This frustrating mechanical failure affects thousands of cyclists daily, but the good news is that chain drops are completely preventable and fixable with the right knowledge.
Chain drops represent one of the most common cycling mechanical issues after flat tires, yet they’re among the most solvable problems you’ll encounter. Understanding why your bike chain keeps falling off and implementing proper fixes will not only restore your confidence but also prevent costly damage to your frame and drivetrain components.
Understanding Chain Drops: The Basics
A dropped chain occurs when your bike chain falls off either the front chainrings or rear cassette, leaving you unable to pedal effectively. Chain drops typically happen in three scenarios: the chain falls off the inside of the small chainring, slides off the outside of the large chainring, or drops off the rear cassette.
Emergency Roadside Fix
When your chain drops during a ride, safety comes first. Move to a safe location away from traffic before attempting any repairs. For a quick temporary fix while riding, you can often get the chain back on without dismounting by shifting your front derailleur in the opposite direction from where the chain fell off. As you shift, pedal slowly with minimal pressure to allow the derailleur to guide the chain back onto the chainring.
7 Main Causes Why Your Bike Chain Keeps Falling Off

Front Derailleur Problems (Most Common Cause)
Improperly adjusted limit screws represent the primary reason chains drop off the front chainrings. The front derailleur uses two limit screws marked “H” (high) and “L” (low) that control how far the derailleur cage can move. When these screws aren’t set correctly, the derailleur allows the chain to travel too far in either direction, causing it to fall off. This is often the first place to check when experiencing persistent chain drop issues.
Derailleur alignment and positioning issues also contribute significantly to chain drops. The front derailleur must be positioned 2-3 millimeters above the large chainring and parallel to the chainrings. If the height is incorrect or the derailleur rotates out of alignment, smooth shifting becomes impossible and your bike chain keeps falling off becomes inevitable.
Cable tension problems create additional complications. Insufficient cable tension prevents the derailleur from moving far enough outward, while excessive tension can pull the chain off the outside of the large chainring.
Chain Length Issues
An incorrectly sized chain creates numerous problems throughout your drivetrain. Chains that are too long lack sufficient tension and can easily bounce off chainrings, especially on rough terrain or during aggressive riding. This is a common reason for chain drops on bumpy trails or during hard accelerations. Conversely, chains that are too short create excessive tension that can damage your derailleur and make shifting impossible in certain gear combinations.
Proper chain length ensures adequate tension across all gear combinations while preventing the rear derailleur from overextending. The standard method involves wrapping the chain around the largest chainring and largest rear cog, then adding four additional links.
Worn Components Affecting Performance


Chain wear and stretch fundamentally alter how your drivetrain functions. As chains accumulate miles, the metal components wear down, causing the chain to literally stretch and no longer mesh properly with chainring and cassette teeth. A worn chain that’s 0.5% stretched should be replaced immediately to prevent damage to other drivetrain components and eliminate chain drop problems.
Worn chainrings and cassette teeth compound the problem. Sharp, asymmetrical teeth or visible wear patterns indicate components that can no longer properly engage with the chain, leading to skipping and dropping.
Loose Drivetrain Components
Loose chainring bolts represent a frequently overlooked cause of chain drops. These bolts can work loose over time, allowing the chainrings to shift position or wobble during pedaling. Regular inspection and proper torque specifications prevent this issue and eliminate one common reason your bike chain keeps falling off.
Loose derailleur mounting creates similar problems. When the derailleur itself becomes loose at its mounting point, precise adjustment becomes impossible and chain drops become common.
Rear Derailleur Adjustment Problems
Bent derailleur hangers cause persistent shifting problems that often manifest as chain drops. The derailleur hanger—the small piece that connects your rear derailleur to the frame—can bend from impacts or crashes, throwing off the entire system’s alignment. A bent hanger is frequently the culprit when chain dropping continues even after other adjustments.
Limit screw misalignment on the rear derailleur can allow the chain to fall off the inside or outside of the cassette. The high and low limit screws must be precisely set to prevent overshift in both directions.
B-tension screw issues affect how closely the upper derailleur pulley sits to the cassette. Incorrect B-tension can cause poor shifting performance and contribute to chain drops under load.
Poor Shifting Technique
Cross-chaining represents the most common rider-induced cause of chain drops. This occurs when cyclists use extreme gear combinations like big chainring with big rear cog, or small chainring with small rear cog. These combinations create severe chain angles that stress the drivetrain and increase drop likelihood, making your bike chain keeps falling off more frequent.
Shifting under heavy load places enormous stress on drivetrain components. Attempting to shift while climbing steep hills or sprinting can overwhelm the derailleur’s ability to smoothly move the chain, resulting in drops.
Maintenance Neglect
Dirty chains and poor lubrication create friction that interferes with smooth shifting. A clean, properly lubricated chain moves smoothly across chainrings and cogs, while a dirty chain struggles to engage properly and increases chain drop frequency.
Lack of regular cleaning allows dirt and debris to accumulate in crucial areas, affecting derailleur performance and chain engagement.
Step-by-Step Diagnostic Process

Begin your diagnosis with a thorough visual inspection checklist. Check all chainring bolts for tightness, examine the chain for stiff links or damage, and verify that both derailleurs appear straight and properly aligned. Look for obvious damage like bent components or loose hardware that might explain persistent chain dropping issues.
Test chain condition using a chain checker tool. Insert the tool into your chain—if it drops completely through, your chain needs replacement. Even minor chain stretch affects shifting performance and increases drop probability.
Check derailleur alignment by sighting down the rear derailleur from behind. The derailleur pulleys should align vertically, and the upper pulley should sit parallel to the cassette cogs. Any deviation indicates a bent hanger requiring professional attention.
Complete Fix Guide by Problem Type
Adjusting Front Derailleur Limit Screws
Start by setting the low limit screw with the chain on the small chainring and largest rear cog. Adjust the L-screw until there’s approximately 1mm clearance between the inner derailleur cage and the chain. Turn clockwise to decrease clearance, counterclockwise to increase it. Proper adjustment here prevents most cases where your bike chain keeps falling off the inside of the small ring.
For the high limit screw adjustment, shift to the large chainring and smallest rear cog. The outer derailleur cage should have 1-2mm clearance from the chain. Use steady cable tension while making adjustments to see the true limit position.
Rear Derailleur Adjustments
Set limit screws properly by first adjusting the high limit with no cable tension. The derailleur should align perfectly with the smallest cog. Then set the low limit by pushing the derailleur to the largest cog and adjusting for proper alignment without allowing the chain to fall into the spokes.
Adjust B-tension to maintain proper upper pulley position. The gap between the upper pulley and largest cog should be 5-6mm. Turn the B-tension screw counterclockwise to decrease the gap, clockwise to increase it.
Chain Maintenance and Replacement
Clean your chain regularly using a dedicated chain cleaning tool and degreaser. Clean and properly maintain your bike chain every 100-150 miles in dry conditions, or after every ride in wet/dirty conditions.
When installing a new chain, ensure proper routing through the rear derailleur and verify the chain length using established measuring techniques. Learn proper chain installation techniques to prevent future chain dropping problems.
Prevention Solutions That Actually Work

Chain Catchers and Guards
Chain catchers provide excellent insurance against dropped chains, especially for competitive cyclists or those riding rough terrain. These devices mount to your front derailleur and prevent the chain from falling off the inside of the small chainring. Popular options include K-Edge and SRAM chain spotters that effectively eliminate most chain drop scenarios.
Installation is straightforward for most braze-on front derailleurs. Simply replace the derailleur mounting bolt with the chain catcher hardware and adjust the catcher to sit 1-2mm from the chain without touching.
Regular Maintenance Schedule
Establish a consistent maintenance routine to prevent problems before they occur. Follow our complete maintenance schedule guide which includes:
- Daily checks: Tire pressure, brake function, gear operation
- Weekly tasks: Chain cleaning and lubrication, bolt tightness inspection
- Monthly maintenance: Deep drivetrain cleaning, component wear assessment
- Seasonal overhauls: Complete drivetrain inspection and component replacement as needed
Proper Riding Techniques
Avoid cross-chaining by understanding which gear combinations create problems. Use small chainrings with larger rear cogs, and large chainrings with smaller rear cogs. When you need to change chainrings, shift the rear derailleur to the middle range first to prevent chain dropping situations.
Anticipate terrain changes and shift before you need the new gear. Shifting under load greatly increases chain drop risk, so make gear changes while pedaling lightly or coasting when possible.
When Professional Help Makes Sense

Seek professional assistance for bent derailleur hangers, which require specialized alignment tools for proper correction. While emergency trail fixes exist, proper hanger alignment needs precise measurement and adjustment to solve persistent chain drop issues.
Complex drivetrain problems involving multiple worn components often require professional assessment. When chains, chainrings, and cassettes wear together, replacement timing and compatibility become crucial factors affecting performance.
Frame damage assessment should always involve professional evaluation. Chain drops that wedge between the frame and chainrings can damage carbon fiber frames, requiring expert inspection to ensure structural integrity.
Essential Tools and Supplies
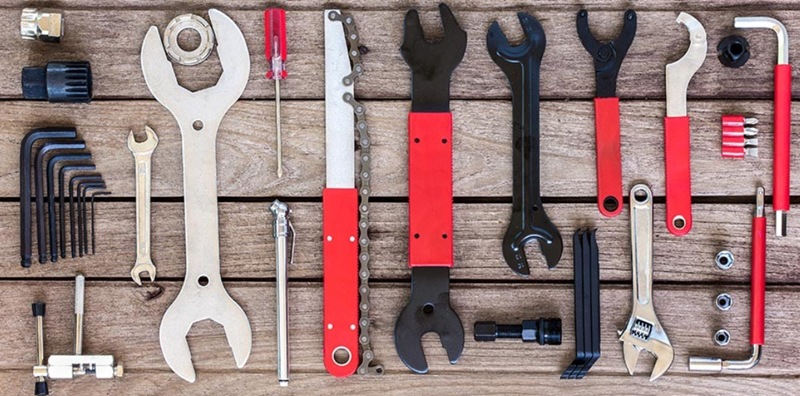
Basic Tool Requirements
Invest in quality derailleur adjustment tools including 2mm, 3mm, 4mm, and 5mm Allen keys, plus Phillips head screwdrivers. A chain tool for length adjustments and a chain checker for wear assessment complete the basic toolkit needed to address most chain dropping problems.
Maintenance Products
Stock reliable chain lubricants appropriate for your riding conditions. Choose the right lubricant for your environment – oil-based for dry conditions, heavier lubes for wet/dirty conditions.
Cleaning supplies including degreasers, chain cleaning tools, and quality rags make regular maintenance manageable.
Troubleshooting Persistent Issues
When your bike chain keeps falling off despite adjustments, systematic troubleshooting reveals the root cause. Start with the most common issues—front derailleur limit screws and chain length—before moving to complex problems like frame alignment or internal cable routing issues.
Document your adjustments to track what works and what doesn’t. Small changes to limit screws or cable tension can have dramatic effects on performance, so methodical adjustment prevents confusion when chain drop problems persist.
Consider component compatibility when problems persist across multiple repair attempts. Mixing drivetrain components from different manufacturers or generations can create subtle incompatibilities that manifest as chronic dropping issues.
Cost Analysis and Long-Term Strategy

Preventive maintenance costs significantly less than reactive repairs. Regular chain replacement every 3,000 miles prevents cassette and chainring damage that can cost hundreds to repair and eliminates most chain dropping scenarios.
Component replacement timing affects overall drivetrain longevity. Replacing chains before 0.75% stretch prevents accelerated wear to other components, extending their service life substantially.
Professional tune-ups cost $75-150 but prevent major drivetrain failures that can sideline your bike for weeks and cost significantly more to repair.
Making Chain Drops History
Eliminating chain drops requires understanding the interconnected nature of your drivetrain system. Front and rear derailleurs, chain condition, component wear, and riding technique all contribute to reliable performance. By addressing each element systematically and maintaining your bike proactively, you’ll transform chain drops from frequent frustrations into rare occurrences.
Remember that your bike chain keeps falling off for specific, identifiable reasons. Whether the solution involves simple limit screw adjustments, component replacement, or technique improvements, consistent diagnosis and quality repairs will keep your chain where it belongs—driving you forward efficiently and reliably.
The key to permanent chain drop elimination lies in regular maintenance, proper adjustment, and understanding your bike’s limits. Explore our complete technical guides for comprehensive information on drivetrain maintenance, component selection, and riding technique optimization. With proper care and attention, your bike’s drivetrain will provide thousands of miles of trouble-free performance, keeping you focused on the joy of cycling rather than mechanical frustrations.
 |  |  |
We are an Amazon affiliate and earn from qualified Amazon purchases with no cost to you. This is for ANY product that you purchase through our links.
If you enjoyed learning about this week’s featured bicycle, don’t miss out on more classic bike goodness! Visit our website at classicjapanesebicycles.com for an extensive collection of timeless Japanese bikes and their unique stories. Plus, check out our YouTube channel, Bicycle Restoration Man, for detailed restoration videos and showcases of our finished projects. Subscribe and join our community of bike enthusiasts!